SLExtensionsを使ったM-V-VMパターン実装
最近、WPF界隈でModel-View-ViewModel(M-V-VM)パターンとかいうデザインパターンが人気らしいのでちょっと調べてみた。
発端は↓この辺からなのか知らないけど、拙い英語力ということもあり、よく理解できなかった。というか、そもそもWPFに興味無いし。
その後にSilverlightでこのパターンを実装したという以下の記事を読んだ。
これはSLExtensionsというSilverilghtのオープンソースライブラリを使って実装したサンプルで、これを読んでM-V-VMパターンがだいたい理解できたので、まとめてみる。
SLExtensionsは以下のCodePlexのサイトからダウンロードできる。
必要なのは「SLExtensions.dll」だけなので、適当なところにコピーしておく。
やってみる
まずはModelから、FirstNameとLastNameプロパティがあるだけの単純なクラス
Model/Person.cs
using System;
using System.Diagnostics;

namespace MVVMSample.Model {
    [DebuggerStepThrough]
    public sealed class Person {
        /// <summary>
        /// 名前を取得、設定します。
        /// </summary>
        public string FirstName {
            get;
            set;
        }
        /// <summary>
        /// 苗字を取得、設定します。
        /// </summary>
        public string LastName {
            get;
            set;
        }
    }
}
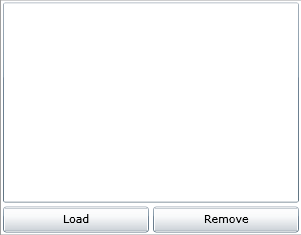
次はView、リストボックスとボタンが二つあるだけの簡単な画面
Page.xaml
<UserControl x:Class="MVVMSample.Page"
    xmlns="http://schemas.microsoft.com/winfx/2006/xaml/presentation"
    xmlns:x="http://schemas.microsoft.com/winfx/2006/xaml"
    Width="300">

    <Grid x:Name="LayoutRoot" Background="White">
        <StackPanel>
            <ListBox x:Name="peopleList" Height="200" Margin="2">
                <ListBox.ItemTemplate>
                    <DataTemplate>
                        <StackPanel>
                            <TextBlock Text="{Binding FirstName}" FontSize="18" />
                            <TextBlock Text="{Binding LastName}" Margin="10,0,0,0" HorizontalAlignment="Right" />
                        </StackPanel>
                    </DataTemplate>
                </ListBox.ItemTemplate>
            </ListBox>

            <Grid Height="30">
                <Grid.ColumnDefinitions>
                    <ColumnDefinition />
                    <ColumnDefinition />
                </Grid.ColumnDefinitions>

                <Button Grid.Column="0" Margin="2" Content="Load" />
                <Button Grid.Column="1" Margin="2" Content="Remove" />
            </Grid>
        </StackPanel>
    </Grid>
</UserControl>
プレビュー
画面仕様は
- 「Load」ボタンをクリックするとリストボックスにPersonクラスの情報をリスト表示する。
- 「Remove」ボタンをクリックするとリストボックスで選択している行を削除する。
と、こんだけ
後はこのViewとModelを連結するためのViewModelクラスを定義する。
ViewModelクラスはSLExtension.NotifyingObjectを継承して作ると便利(別に必須ではない)。
ViewModel/PersonViewModel.cs
namespace MVVMSample.ViewModel {
    public sealed class PersonViewModel : SLExtensions.NotifyingObject {
        public PersonViewModel() {
        }
    }
}
SLExtensions.NotifyingObjectは単にINotifyPropertyChangedインターフェースを実装しているだけの基本クラス。ここではコンストラクタだけ定義している。
とりあえずこのViewModelをViewに関連付けておく。
Page.xaml.cs
using System;
using System.Windows.Controls;

using MVVMSample.ViewModel;

namespace MVVMSample {
    public partial class Page : UserControl {
        public Page() {
            this.DataContext = new PersonViewModel();

            InitializeComponent();
        }
    }
}
ViewのコンストラクタでDataContextプロパティにインスタンスを代入しておくだけ。これは諸事情*1により必ずInitializeComponentメソッドの前に書く必要がある。
あとは各UI要素にイベントの関連付けとそこから返されるデータをデータバインディングするんだけど、この辺に「Command」という機構を利用する。WPFでは標準で用意されているみたいだけど、Silverlightには用意されていないのでSLExtensionsでは独自にこれを提供している。
まずはViewModelにPersonのリストを返すプロパティを追加する。
ViewMode/PersonViewModel.cs
using System;
using System.Collections.ObjectModel;

using MVVMSample.Model;

namespace MVVMSample.ViewModel {
    public sealed class PersonViewModel : SLExtensions.NotifyingObject {
        private ObservableCollection<Person> people = new ObservableCollection<Person>();

        /// <summary>
        /// Personのリストを取得します。
        /// </summary>
        public ObservableCollection<Person> People {
            get { return people; }
            private set {
                var oldValue = this.People;

                this.people = value;

                if(oldValue != value) {
                    OnPropertyChanged("People");
                }
            }
        }

        public PersonViewModel() {
        }
    }
}
そして、これをViewのリストボックスにバインドしておく。
Page.xaml
<UserControl x:Class="MVVMSample.Page"
    xmlns="http://schemas.microsoft.com/winfx/2006/xaml/presentation"
    xmlns:x="http://schemas.microsoft.com/winfx/2006/xaml"
    Width="300">
    <Grid x:Name="LayoutRoot" Background="White">
        <StackPanel>
            <ListBox x:Name="peopleList" Height="200" Margin="2"
                     ItemsSource="{Binding People}">
                <ListBox.ItemTemplate>
                    <DataTemplate>
                        <StackPanel>
                            <TextBlock Text="{Binding FirstName}" FontSize="18" />
                            <TextBlock Text="{Binding LastName}" Margin="10,0,0,0" HorizontalAlignment="Right" />
                        </StackPanel>
                    </DataTemplate>
                </ListBox.ItemTemplate>
            </ListBox>

            <Grid Height="30">
                <Grid.ColumnDefinitions>
                    <ColumnDefinition />
                    <ColumnDefinition />
                </Grid.ColumnDefinitions>

                <Button Grid.Column="0" Margin="2" Content="Load" />
                <Button Grid.Column="1" Margin="2" Content="Remove" />
            </Grid>
        </StackPanel>
    </Grid>
</UserControl>
で、次は「Load」ボタンがクリックされた時にこのPersonのリストの内容を変更すれば自動的にリストボックスにデータが表示されるわけだけど、このイベントの関連付けをどうするかというのがポイントになる。ここでCommandを使うわけですね。
ViewModel/PersonViewModel.cs
using System;
using System.Collections.ObjectModel;

using MVVMSample.Model;

using SLExtensions.Input;

namespace MVVMSample.ViewModel {
    public sealed class PersonViewModel : SLExtensions.NotifyingObject {
        private ObservableCollection<Person> people = new ObservableCollection<Person>();

        /// <summary>
        /// Personのリストを取得します。
        /// </summary>
        public ObservableCollection<Person> People {
            get { return people; }
            private set {
                var oldValue = this.People;

                this.people = value;

                if(oldValue != value) {
                    OnPropertyChanged("People");
                }
            }
        }

        public PersonViewModel() {
            var loadCommand = new Command("Load");
            loadCommand.Executed += loadCommand_Executed;
        }

        void loadCommand_Executed(object sender, ExecutedEventArgs e) {
            People = new ObservableCollection<Person> {
                new Person { FirstName="Yngwie", LastName="Malmsteen" },
                new Person { FirstName="John", LastName="Sykes" }
            };
        }
    }
}
コンストラクタでCommandクラスをインスタンス化して、Executedイベントにイベントハンドラを関連付けている。
コマンドが実行されるとExecutedイベントが呼び出されるので、ここでPersonのリストの内容を変更している。
このコマンドを「Load」ボタンに関連付けるには以下のようにする。
Page.xaml
<UserControl x:Class="MVVMSample.Page"
    xmlns="http://schemas.microsoft.com/winfx/2006/xaml/presentation"
    xmlns:x="http://schemas.microsoft.com/winfx/2006/xaml"
    xmlns:Input="clr-namespace:SLExtensions.Input;assembly=SLExtensions"
    Width="300">

    <Grid x:Name="LayoutRoot" Background="White">
        <StackPanel>
            <ListBox x:Name="peopleList" Height="200" Margin="2"
                     ItemsSource="{Binding People}">
                <ListBox.ItemTemplate>
                    <DataTemplate>
                        <StackPanel>
                            <TextBlock Text="{Binding FirstName}" FontSize="18" />
                            <TextBlock Text="{Binding LastName}" Margin="10,0,0,0" HorizontalAlignment="Right" />
                        </StackPanel>
                    </DataTemplate>
                </ListBox.ItemTemplate>
            </ListBox>

            <Grid Height="30">
                <Grid.ColumnDefinitions>
                    <ColumnDefinition />
                    <ColumnDefinition />
                </Grid.ColumnDefinitions>

                <Button Grid.Column="0" Margin="2" Content="Load" Input:CommandService.Command="Load" />
                <Button Grid.Column="1" Margin="2" Content="Remove" />
            </Grid>
        </StackPanel>
    </Grid>
</UserControl>
Input:CommandService.Commandという添付?プロパティでコマンド名を設定する事ができる。
こんな感じでViewを切り離す事ができる。
残りの機能を実装したコードが以下
ViewModel/PersonViewModel.cs
using System;
using System.Collections.ObjectModel;

using MVVMSample.Model;

using SLExtensions.Input;

namespace MVVMSample.ViewModel {
    public sealed class PersonViewModel : SLExtensions.NotifyingObject {
        private ObservableCollection<Person> people = new ObservableCollection<Person>();

        /// <summary>
        /// Personのリストを取得します。
        /// </summary>
        public ObservableCollection<Person> People {
            get { return people; }
            private set {
                var oldValue = this.People;

                this.people = value;

                if(oldValue != value) {
                    OnPropertyChanged("People");
                }
            }
        }

        /// <summary>
        /// 選択しているPersonを取得、設定します。
        /// </summary>
        public Person SelectedPerson {
            get;
            set;
        }

        public PersonViewModel() {
            var loadCommand = new Command("Load");
            loadCommand.Executed += loadCommand_Executed;

            var removeCommand = new Command("Remove");
            removeCommand.Executed += removeCommand_Executed;
            removeCommand.CanExecute += removeCommand_CanExecute;
        }

        void loadCommand_Executed(object sender, ExecutedEventArgs e) {
            People = new ObservableCollection<Person> {
                new Person { FirstName="Yngwie", LastName="Malmsteen" },
                new Person { FirstName="John", LastName="Sykes" }
            };
        }

        void removeCommand_Executed(object sender, ExecutedEventArgs e) {
            if(People.Remove(SelectedPerson)) SelectedPerson = null;
        }

        void removeCommand_CanExecute(object sender, CanExecuteEventArgs e) {
            e.CanExecute = SelectedPerson != null;
        }
    }
}
Page.xaml
<UserControl x:Class="MVVMSample.Page"
    xmlns="http://schemas.microsoft.com/winfx/2006/xaml/presentation"
    xmlns:x="http://schemas.microsoft.com/winfx/2006/xaml"
    xmlns:Input="clr-namespace:SLExtensions.Input;assembly=SLExtensions"
    Width="300">

    <Grid x:Name="LayoutRoot" Background="White">
        <StackPanel>
            <ListBox x:Name="peopleList" Height="200" Margin="2"
                     ItemsSource="{Binding People}" SelectedItem="{Binding SelectedPerson, Mode=TwoWay}">
                <ListBox.ItemTemplate>
                    <DataTemplate>
                        <StackPanel>
                            <TextBlock Text="{Binding FirstName}" FontSize="18" />
                            <TextBlock Text="{Binding LastName}" Margin="10,0,0,0" HorizontalAlignment="Right" />
                        </StackPanel>
                    </DataTemplate>
                </ListBox.ItemTemplate>
            </ListBox>

            <Grid Height="30">
                <Grid.ColumnDefinitions>
                    <ColumnDefinition />
                    <ColumnDefinition />
                </Grid.ColumnDefinitions>

                <Button Grid.Column="0" Margin="2" Content="Load" Input:CommandService.Command="Load" />
                <Button Grid.Column="1" Margin="2" Content="Remove" Input:CommandService.Command="Remove" />
            </Grid>
        </StackPanel>
    </Grid>
</UserControl>
Viewがかなりすっきりするので分かり易いんでないかな。もうちょっと調べてみよう。
*1:SLExtensionsの実装上の都合
